

Overhead garage storage rack solutions can free up valuable floor space in your garage, but it’s critical to choose a system that your ceiling structure can support and to install it safely. This guide will show you how to quickly check your ceiling’s true storage capacity, compare fixed racks, motorized lifts, and pulley hoists, and determine if DIY or professional installation is right for your situation—all with real cost examples and step-by-step safety checks. Get clarity now before you drill a single hole or buy the wrong rack.
Key Takeaways
- Always confirm your ceiling’s live load rating (10–20 psf per the IRC) and anchor racks directly to joists—never to drywall or truss webbing.
- Choose a rack type (fixed, motorized, or pulley) based on your ceiling capacity, budget, and access needs; installation cost for a basic 4×8 rack averages $730–$770 nationwide.
- Test every new installation with a small load, inspect hardware at 24 hours, and keep long-term weight below both the rack and ceiling capacity.
- What Is an Overhead Garage Storage Rack?
- How to Select and Safely Install Overhead Garage Storage (Step-by-Step Guide)
- Trade-Offs, Pitfalls, and Comparison: How to Get It Right
- Conclusion: Next Steps for Safe, Practical Storage
- Frequently Asked Questions
What Is an Overhead Garage Storage Rack?
An overhead garage storage rack is a ceiling-mounted platform—fixed or movable—designed to store boxes, totes, and gear above your vehicles to maximize your garage’s cubic storage without crowding floor space. These racks typically bolt into the home’s ceiling joists or truss chords and are available as fixed steel frames (often 4×8 feet, up to 600–1000 lb rating), motorized lift platforms, and simple pulley hoists.
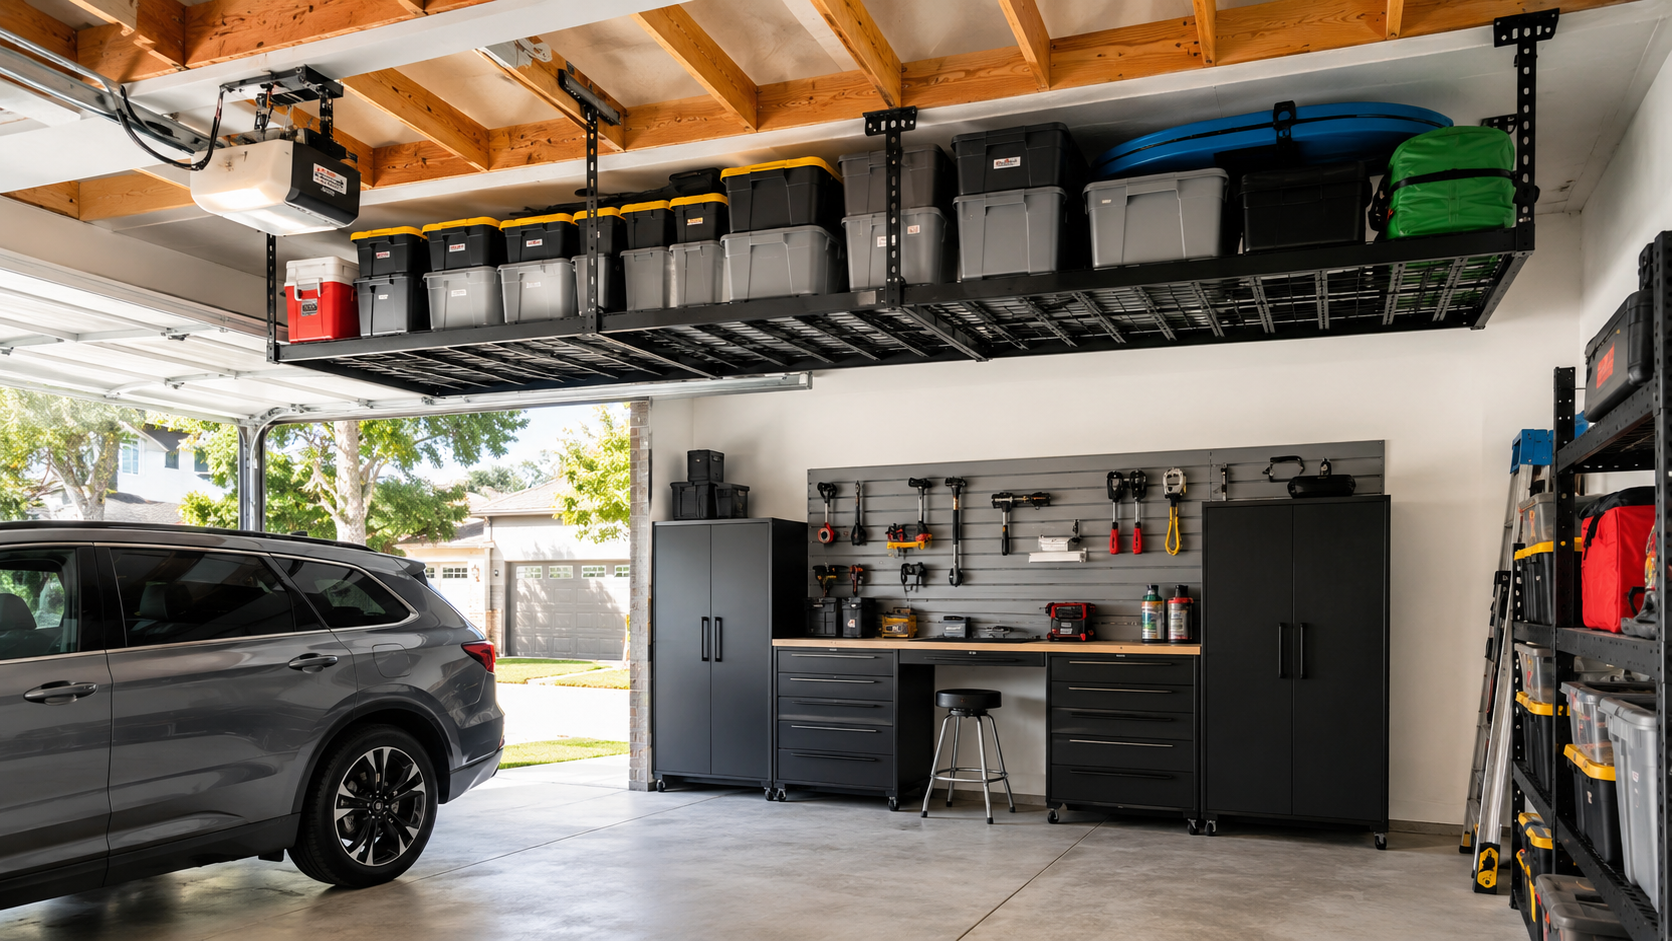
Why It Matters: With the right rack and a safe, code-compliant install, you can reclaim parking space, organize seasonal items, and improve your garage’s function. But an unsafe install risks ceiling collapse, vehicle damage, or injury (see evidence).
Key Caveats:
- You must match the load to what your garage ceiling can actually carry—often much less than the rack’s marketing claims.
- Altering engineered trusses (drilling, notching) is prohibited under IRC unless approved by a registered design professional (source).
- Store only items you don’t need to access frequently overhead. For everyday tools, check garage slatwall systems instead.
Before investing, check your ceiling structure and realistic capacity using the detailed methods below.
How to Select and Safely Install Overhead Garage Storage (Step-by-Step Guide)
Follow these practical steps to choose, size, and install your overhead rack safely:
1. Quick Decision Checklist: Can You Install Overhead Storage?
- Measure your garage ceiling height. Ideal: maintain ~8 feet clearance under the rack for headroom and to avoid door/trunk collisions.
- Find ceiling structure (use a stud finder): Are they solid wood joists or engineered trusses?
- Determine attic/truss live load (IRC Table R301.5):
- Most garages: 10 psf (no storage allowed), only 20 psf if “limited storage attic” designed and marked.
- Trusses: Never cut, drill, or notch for hardware unless you have written engineering approval (see IRC R802.10.4).
- If all checks pass, you may choose and install a rack. If not, consult a pro or engineer.
Stop! If joists are water-damaged, undersized, or you can’t confirm ceiling load, stop and get a professional assessment.
2. Calculate Your Rack’s Safe Capacity
- Calculate planned rack footprint:
- 4×8 ft = 32 sq ft; 2×4 ft = 8 sq ft; 4×6 ft = 24 sq ft.
- Ceiling load (psf): Multiply sq ft by your ceiling’s design rating:
- Example: 32 sq ft × 10 psf = 320 lb max (standard garage ceiling); at 20 psf = 640 lb.
- Compare to rack’s rated capacity (400–600 lb common; heavy duty 800–1,500 lb). Your true safe limit is the lower of ceiling calculation or rack rating. Always stay below 75% of max for safety (source).
| Rack Size (ft) | Sq Ft | 10 psf (lb) | 20 psf (lb) |
|---|---|---|---|
| 2×4 | 8 | 80 | 160 |
| 4×6 | 24 | 240 | 480 |
| 4×8 | 32 | 320 | 640 |
3. Choose Your Rack Type and Source
- Fixed overhead racks: 400–600 lb typical (examples: Gladiator, Fleximounts, ONRAX). Durable and affordable but require ladder.
- Motorized Lifts: 350–600+ lb, app/remote controlled, best for frequent access or heavy loads; costlier, often pro install only.
- pulley hoists: 100–250 lb, light duty for boxes, kayaks, bikes. Simple but limited capacity.
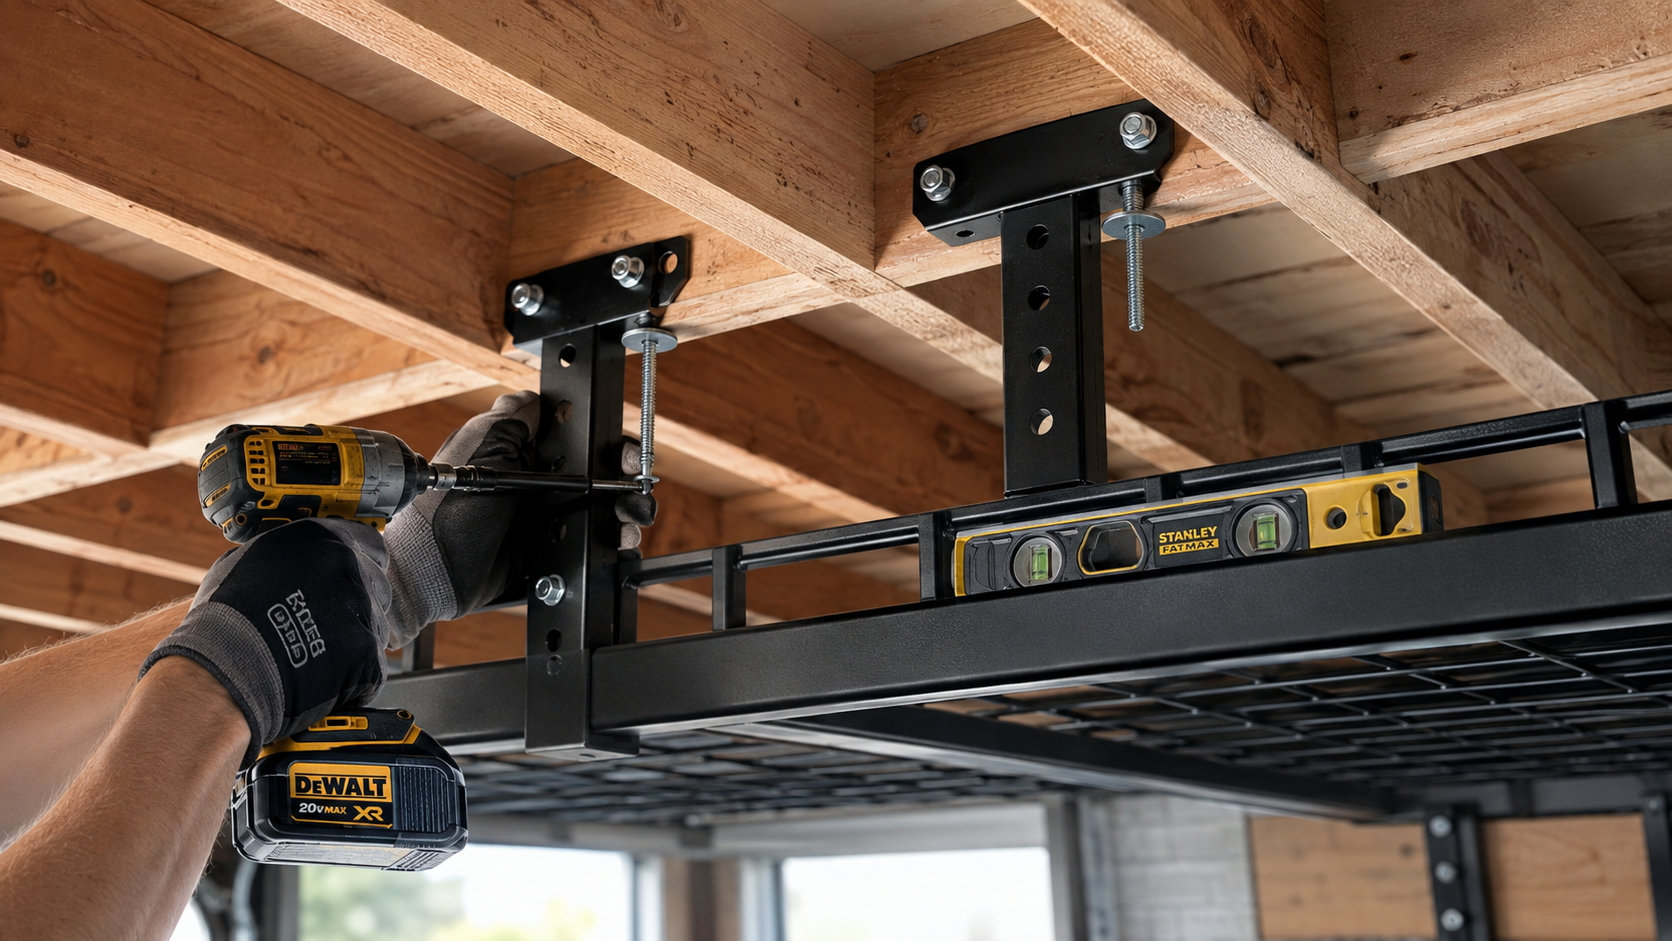
4. Installation Best Practices (Verify or Instruct Your Installer)
- Anchor only into structural joists (never drywall); confirm no electrical or plumbing above with a scanner.
- Use heavy-duty lag bolts or structural wood screws (commonly 3/8” × 5” or longer).
- Distribute the rack’s load across at least three joists; never all into one or two.
- Check joist health: no splitting, water stains, sag, or rot. If in doubt, stop and assess.
- Pre-drill pilot holes to prevent joist splitting.
- Initial safety test: After installation, load 50–100 lb evenly on the rack. Inspect all fasteners after 24 hours for movement or pull-out (source).
Consider budgeting for a professional if your garage ceiling is vaulted, has truss webs, or joist condition is uncertain.
5. Budget & Timing: Realistic Installed Costs
- Standard 4×8 fixed rack (600 lb): $730–$770 installed ($330 for product + $400 typical installation). See cost detail in table below.
- Regional variation: Northeast/West $900–$1,180; Midwest/South $630–$730.
- Heavy-duty 1,000 lb: $600–$700 (product), $1,100–$1,600 (installed).
- Pulley hoists: $150–$300 (product), $400–$600 (installed).
- Install time: 3–4 hours for pros; labor rates $60–$85/hr nationally.
For more budget garage storage ideas, see our garage organization ideas for under $50.
Trade-Offs, Pitfalls, and Comparison: How to Get It Right
Choosing the right overhead rack is about safety and functionality—not just maximizing capacity.
Main Trade-Offs
- Fixed racks: Best for heavy, infrequently accessed items. Pro: High capacity, stable. Con: Ladder required, not good for daily-use items.
- Motorized lifts: Ideal for frequent/heavy items. Pro: Powered access, great for seniors. Con: Highest cost, require expert installation.
- Pulley hoists: Perfect for light loads (bikes, kayaks, roof boxes). Pro: Inexpensive, DIY-friendly. Con: Limited capacity, more manual effort.
| Use Case | Typical Capacity (lb) | Product Cost | Installed Cost | Pros | Cons |
|---|---|---|---|---|---|
| 4×8 Fixed Rack | 400–600 | $280–$380 | $730–$770 | High strength, simple, many sizes | Ladder needed, not for daily access |
| Heavy Duty (1,000+ lb) | 800–1,500 | $600–$700 | $1,100–$1,600 | Max storage, superior steel build | Expensive, always pro install |
| Motorized Lift (4×4) | 350–600 | $550–$900 | $1,200–$2,000 | Easy load/unload, remote control | Complex, professional only |
| Pulley Hoist System | 100–250 | $150–$300 | $400–$600 | Low cost, quick access, DIY options | Light loads only, less stable |
Common Pitfalls & Safety Hazards
- Anchoring into drywall or subfloor, not structural joists—leads to pull-out failures.
- Overloading racks or exceeding ceiling live load (ignore “max rack” marketing—ceiling rating always governs).
- Ignoring truss restrictions (drilling or notching unapproved) violates code and voids insurance (see IRC R802.10.4).
- Uneven loading—concentrates weight, causing sag or collapse.
- Insufficient clearance—blocks vehicle doors, lids, or overhead garage mechanisms.
Mitigation Steps: Always anchor to joists, keep heaviest items off overhead racks, test load before storing family valuables, and maintain a load/photo record for safety.
For finding joists and measuring their condition, see our step-by-step ceiling joist assessment guide (coming soon).
Conclusion: Next Steps for Safe, Practical Storage
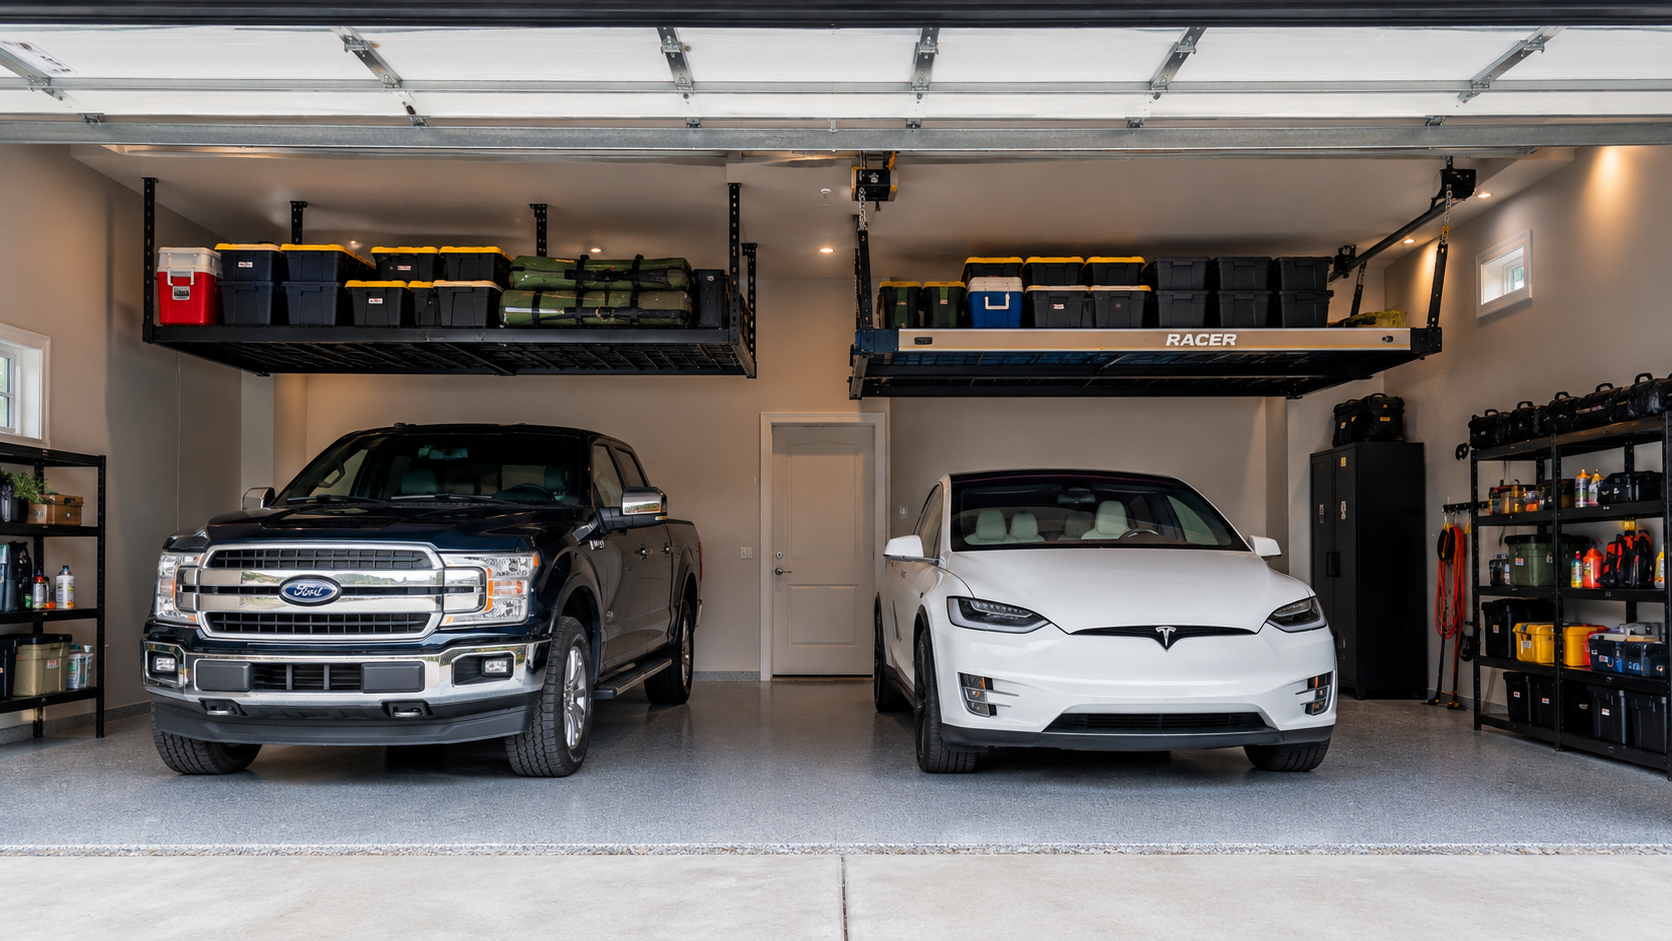
With clear ceiling load checks and the right type of overhead garage storage rack, you can dramatically increase garage floor space without risking your structure, property—or your safety. Remember, the safest solution is the one that’s within your home’s true load capacity, not just the rack’s packaging claim. If in doubt about engineering or fastening, don’t guess: hire a seasoned pro to avoid the top failure modes and protect your investment.
Want more ways to maximize home storage? Explore our closet organization system guide, small bedroom storage strategies, or home office organizing tips for more ideas. Ready to start? Download the cost comparison table in the appendix below and check your garage before ordering any rack.
Frequently Asked Questions
How much weight can my garage ceiling really hold—and how do I calculate it for a 4×8 rack?
Most garage ceilings are designed for 10 psf (no storage) or 20 psf (limited storage attics). For a 4×8 ft rack (32 sq ft), the max load is 320 lb at 10 psf, or 640 lb at 20 psf. Always use the lower of this value and the rack’s stated rating, and keep total load to about 75% of that for safety. See IRC Table R301.5 and detailed guidance here.
Can I drill into my roof trusses to install an overhead rack?
No. Under IRC Section R802.10.4, it is prohibited to cut, notch, or drill roof truss members without explicit approval from a registered design professional. Improper truss alteration is a top cause of structural failure and may void insurance.
What clearance do I need between a rack and my vehicle/garage door hardware?
Ideally, maintain at least 8 feet total headroom from the garage floor to the underside of the rack to ensure safe walking clearance. Also check above for door tracks, openers, and trunk lids—rack bottom should be well clear when all doors are open.
Is it safe to install an overhead garage storage rack myself, and when should I hire a professional?
If you can confidently identify ceiling joists in good condition, confirm live load per code, and follow fastening best practices, DIY is possible for fixed and pulley systems. Hire a professional if you have trusses, vaulted/obstructed ceilings, plan on a motorized lift, or are unsure of ceiling load or joist health.
How do I test an overhead rack after installation to be confident it’s secure?
After installation, load the rack with 50–100 lb evenly distributed, then wait 24 hours. Reinspect all fasteners, joist attachment points, and look for any sagging or pull-out. Only load up to the full planned capacity after this check passes.