

Table of Contents
- Step 1: Start with a Full Pantry Audit (Purge First, Always)
- Step 2: Build a Categorization System That Actually Works
- Step 3: Choose the Right Bins for Every Category
- Step 4: Don’t Ignore the Pantry Door
- Step 5: Label Everything (Seriously, Everything)
- Step 6: Implement FIFO Rotation for Food Freshness
- Small Pantry vs. Walk-In Pantry: Tailored Tips for Each
- Maintaining Your Organised Pantry Long-Term
A chaotic pantry costs you more than you think. Forgotten cans buried at the back, duplicate spice jars, expired pasta lurking on the top shelf — it all adds up to wasted money, wasted time, and a whole lot of daily frustration. The good news? Pantry organization ideas don’t have to be complicated or expensive to be genuinely life-changing. Whether you’re working with a narrow cabinet or a full walk-in pantry, this complete guide walks you through exactly how to organize a pantry step by step — and keep it that way. Remembering the importance of a pantry organization ideas will help.
Step 1: Start with a Full Pantry Audit (Purge First, Always)
Before you buy a single bin or label, pull everything out. Yes, everything. Lay it across your kitchen counter or table and take a hard look at what you actually have. This purge phase is the most important step in any pantry organization project, and skipping it means you’re just organizing clutter.
As you sort through your items, check expiration dates ruthlessly. Toss anything expired, donate sealed items you genuinely won’t use, and consolidate duplicates — that means pouring three half-empty bags of flour into one container. If you’ve been meaning to tackle other areas of your home too, the same disciplined mindset applies; our guide on how to declutter a small home can help you extend this momentum room by room.
Once your pantry is empty and wiped clean, you’re ready to build a smarter system from scratch.
Step 2: Build a Categorization System That Actually Works
The golden rule of pantry organization is simple: like goes with like. Group your food by category so every family member knows exactly where to find things — and where to put them back. Here’s a reliable category framework to start with:
- Baking supplies: flour, sugar, baking powder, chocolate chips, vanilla extract
- Snacks: granola bars, chips, crackers, popcorn, nuts
- Canned goods: beans, soups, tomatoes, sauces, vegetables
- Spices and condiments: dried herbs, spice blends, oils, vinegars
- Grains and pasta: rice, quinoa, oats, noodles, lentils
- Breakfast items: cereals, coffee, tea, protein powders
- Kids’ snacks: a dedicated zone reduces rummaging through adult staples
Assign each category a fixed shelf or zone in your pantry. High-traffic items — snacks, cereals, coffee — go at eye level. Heavy canned goods belong on lower shelves. Rarely used baking supplies can live on an upper shelf.
Step 3: Choose the Right Bins for Every Category
Not all storage containers are created equal. Matching the right bin type to each food category is what separates a functional pantry from one that just looks good in photos.
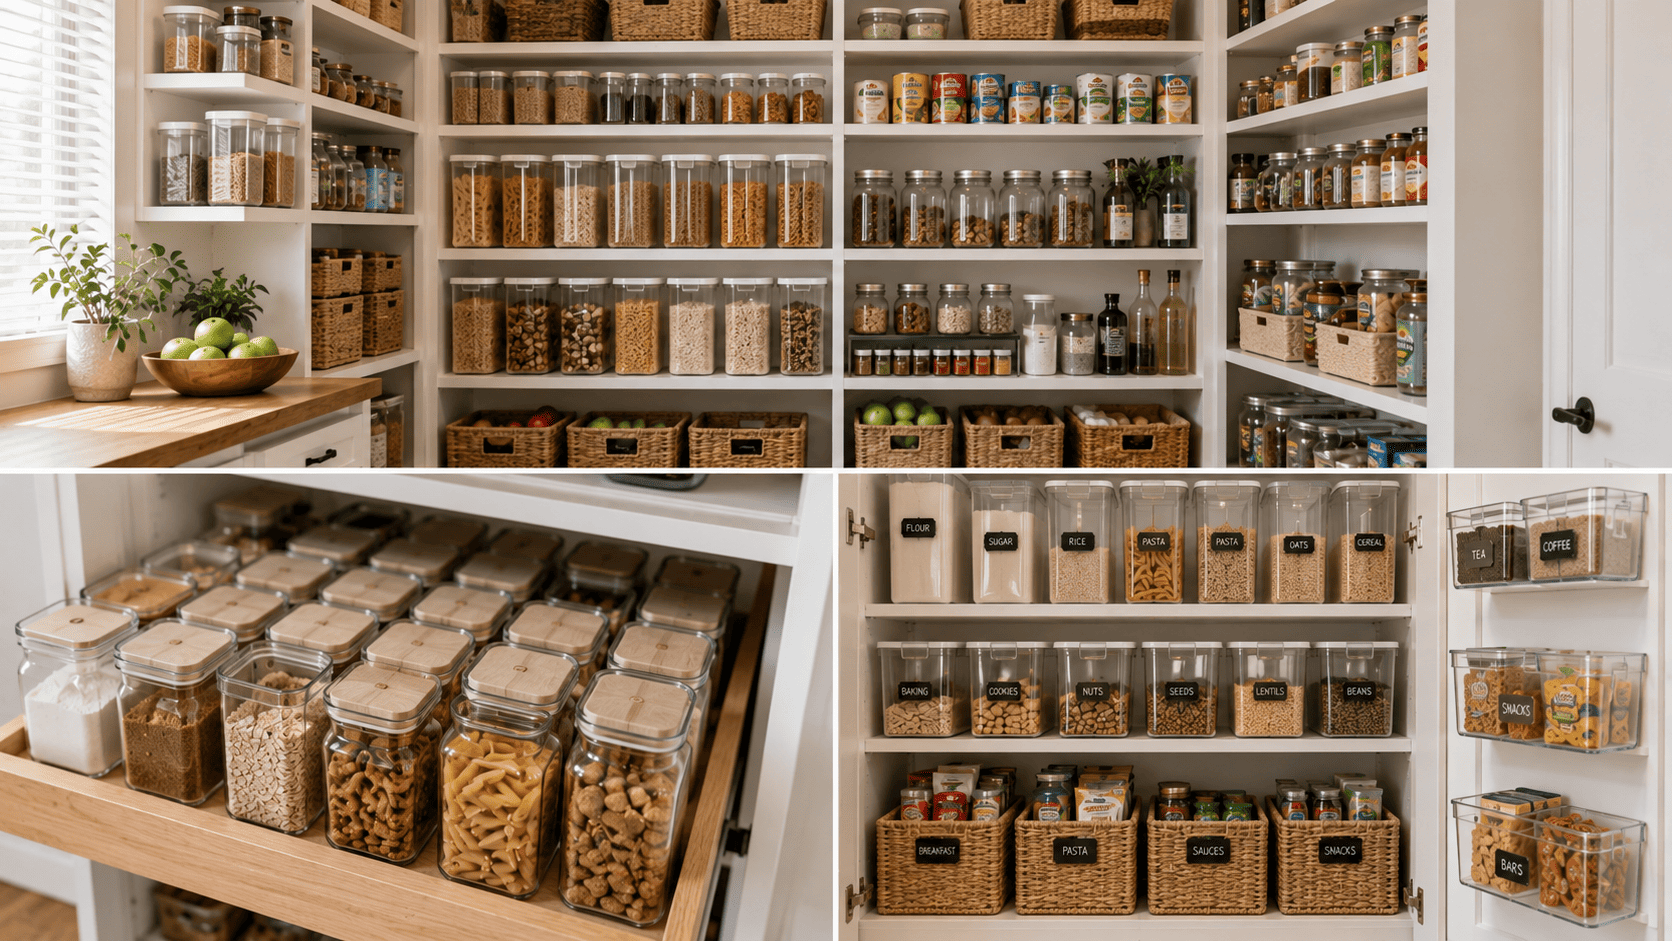
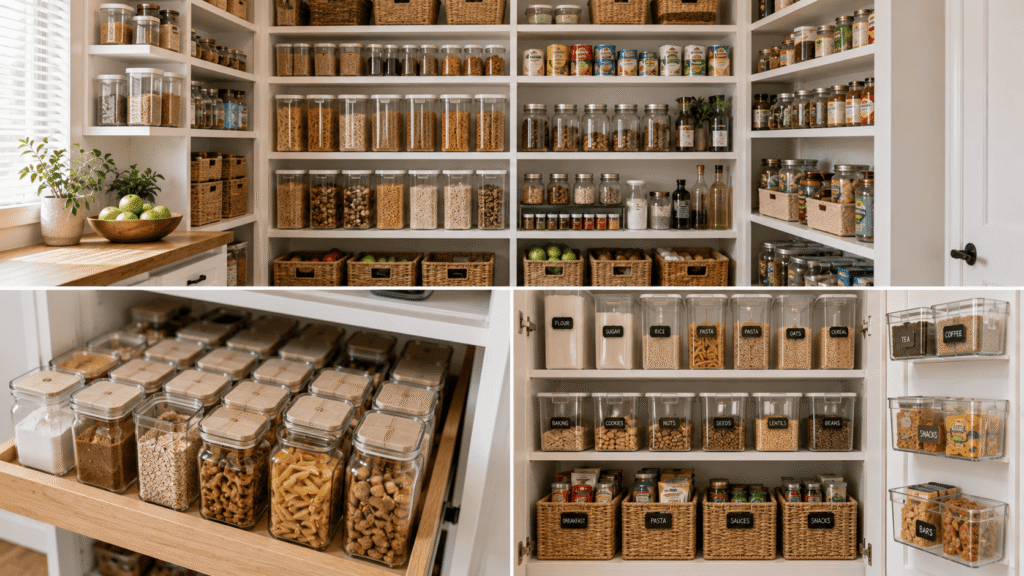
Acrylic and Clear Bins
Stackable pantry bins made from clear acrylic are ideal for snacks, packet foods, and items you want to see at a glance. Pull-out acrylic bins are especially popular because they let you reach the back of deep shelves without dragging everything forward. Look for styles with a front opening or lip for easy one-handed access.
Bamboo Pantry Organizers
For a warmer, more natural aesthetic, a bamboo pantry organizer is an excellent choice. Bamboo trays and drawer dividers work beautifully for spice organization, cutting board storage, or corralling oils and condiment bottles. They’re also a more eco-conscious option — something worth considering if you’re building toward sustainable storage solutions throughout your home.
Wire and Metal Bins
Wire baskets promote air circulation and are ideal for produce like onions, garlic, and potatoes. They’re also great for bulky packaged snacks, bread, and items that need a little breathing room. Stackable wire bins with handles are particularly useful in deeper pantries where access is a challenge.
The Best Pantry Storage Bins and Labels: Top Picks by Category
- Snacks & packets: Clear stackable bins with front pull-out opening
- Baking supplies: Airtight canisters (OXO Pop containers are a perennial favourite) with chalkboard labels
- Canned goods: Tiered can organizers or stepped risers so every label faces forward
- Spices: Uniform spice jars in a bamboo drawer insert or a magnetic wall strip
- Produce: Ventilated wire baskets or mesh bins at the bottom of your pantry
Step 4: Don’t Ignore the Pantry Door
The inside of your pantry door is premium real estate that most people completely waste. A good pantry door organizer — whether it’s an over-the-door rack, pocket organizer, or slim shelving unit — can add significant extra storage without using a single inch of shelf space.
Use the door for:
- Spice jars and small packets
- Foil, cling wrap, and baking paper rolls
- Cleaning supplies (if your pantry doubles as a utility cupboard)
- Snack pouches and lunchbox items for easy morning access
Choose a door organizer with adjustable tiers so you can customize pocket height to fit your items. Make sure it’s rated for the weight of what you’re storing — overfilling a flimsy rack is a recipe for a very messy morning.
Step 5: Label Everything (Seriously, Everything)
Labeling is the single habit that determines whether your pantry organization ideas last longer than two weeks. When every shelf, bin, and canister has a clear label, everyone in the household knows the system — and knows how to maintain it.
The best pantry storage bins and labels approach combines both: use matching containers for a cohesive look, then label them consistently. Options include:
- Printed labels: Use a label maker (Brother P-Touch is a classic) for clean, professional-looking text
- Chalkboard labels: Stick-on chalkboard squares are flexible and can be updated when you change what’s stored
- Clear label tape: Ideal for glass jars where you want the contents to remain fully visible
Label not just the containers but also the shelf zones themselves. A simple “BAKING” label at the front edge of a shelf takes away any ambiguity when putting groceries away in a hurry.
Step 6: Implement FIFO Rotation for Food Freshness
FIFO — First In, First Out — is the stock rotation method used by every professional kitchen and grocery store. It’s just as valuable at home. When you unpack new groceries, always place newer items behind older ones. This ensures you reach for and use the oldest stock first, dramatically reducing food waste and the chance of finding expired items buried at the back.
For canned goods, a simple tiered can organizer handles this automatically — cans roll to the front as you remove them. For dry goods in bins, make it a habit to pour new product in from the top and scoop from the bottom.
Small Pantry vs. Walk-In Pantry: Tailored Tips for Each
Small Pantry Organization Ideas
If you’re working with a single cabinet or a narrow closet, small pantry organization ideas hinge on vertical space. Install extra shelves if you can, use stackable bins to double your storage height, and lean heavily on a pantry door organizer to compensate for limited interior shelf depth. Slim risers and tiered stands let you see everything at once without needing extra width. The same space-smart thinking that works in compact pantries translates well to other tight spaces — check out our tips for storage solutions for small bedrooms for more ideas on maximizing every inch.
Walk-In Pantry Organization
A walk-in pantry gives you room to get creative. Zone your space by assigning each wall or section to a specific category. Use floor space for bulky items, large bins, or a rolling cart. Add hooks to the wall for aprons, reusable bags, or hanging baskets. With more room comes more responsibility — without clear zones and labels, a walk-in pantry can become overwhelming faster than a small cabinet.
Maintaining Your Organised Pantry Long-Term
The best system is one you’ll actually stick to. Keep a running list on the pantry door (or in a notes app) of what needs restocking. Do a quick five-minute reset at the end of each week — just put strays back in their zones and pull anything approaching its expiry date to the front. A full pantry audit once every three to four months keeps things from creeping back into chaos.
Ready to take your kitchen from cluttered to completely under control? Start with one shelf today — clear it, categorize it, label it. You’ll be amazed how quickly that momentum builds. Browse our full range of sustainable storage solutions and home decluttering guides to keep the transformation going beyond the pantry door.